
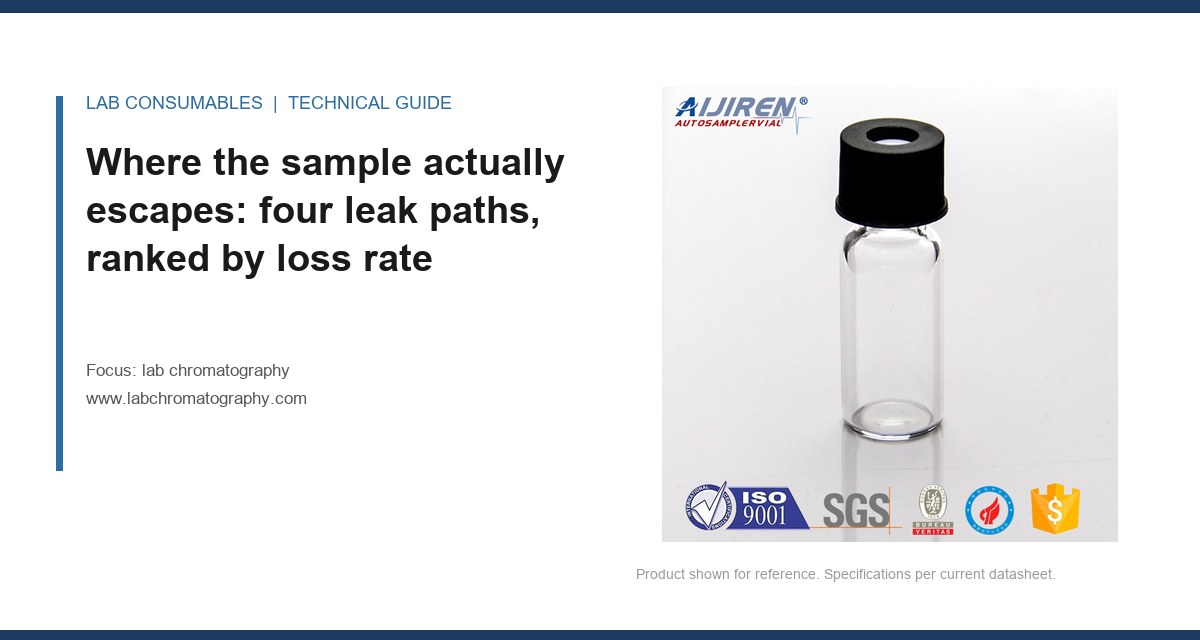
A 96-vial HPLC batch on a Waters Alliance came back with three injections at 71, 68, and 74 percent of nominal peak area. The autosampler had run overnight at 8 °C with a 12-hour cycle time. The column was fine. The lamp had 1,900 hours on it. The problem was a lab chromatography seal failure: the septum on each vial had been punctured once at injection, and the silicone core had not closed behind the 0.63 mm needle. Over ten hours, the sample in those three vials lost roughly 9 mg of acetonitrile to the headspace and out through the needle track. The peak area drop tracked the weight loss almost 1:1. That is the whole article in one paragraph: evaporation and sample loss in lab chromatography are measurable, predictable, and almost always traceable to a seal that did not re-close.
I have weighed a lot of vials before and after a run, and the loss always comes from one of four places. Rank them by how much they cost you in a typical overnight sequence.
1. The needle track through the septum
This is the dominant path in autosampler work. A standard 11 mm septum is punched by a 0.5 to 0.7 mm OD needle, and the silicone or silicone/PTFE laminate has to swell back and close the hole. Good silicone does this within seconds. Cheap silicone, or silicone that has been sitting in a hot autosampler tray for six hours, does not. A needle track that stays open at 0.1 mm diameter leaks about 0.4 µL of headspace vapor per hour at 25 °C with a volatile solvent like dichloromethane. Over a 12-hour run that is a few microliters of condensed solvent gone, and if your analyte is more volatile than the solvent, it leaves faster.
2. The crimp or screw thread interface
On crimp vials, the seal is made by deforming the aluminum cap skirt against the glass bead finish. If the crimper is set too loose, the septum is not compressed and the headspace leaks past the cap. If it is set too tight, the septum is over-compressed and takes a permanent set (more on that below), which is worse because it looks sealed and is not. On screw-thread vials, the seal is a PTFE-faced silicone liner compressed against the thread. Threaded vials with a molded thread and a matching cap are reliable; cheap “universal” screw vials with a short thread are not.
3. The septum-to-cap bond
Some septa are held in the cap by friction only. Under vacuum or positive headspace pressure (purge-and-trap, headspace GC), the septum can lift slightly off the cap and leak around its edge. This is the path that shows up as a slow drift in headspace GC, not as a sudden failure.
4. The vial-to-septum contact face
Rarely the problem, but if the glass bead finish is chipped or the vial lip is out of round, no septum will seal it. A 5 percent reject rate on a lot of vials is enough to poison a batch. Inspect a sample of 20 vials per case with a 10x loupe before you blame the septum.
Re-seal behaviour after puncture: what the numbers look like
The single most useful measurement I make on a septum is not its durometer or its thickness. It is the re-seal time: how long after the needle withdraws the puncture closes to a leak-tight state. You can measure it crudely and repeatably.
Take a 2 mL crimp vial, fill it with 1.5 mL of methanol, crimp a septum on with a calibrated crimper at the manufacturer’s specified setting (for a 11 mm crimp, typically 0.8 to 1.2 mm of skirt compression), weigh it to 0.1 mg, puncture it once with a 0.63 mm needle, withdraw, and weigh again at 1, 5, 15, and 60 minutes. The weight loss curve tells you everything.
| Septum type | Thickness | Durometer (Shore A) | Weight loss, 1 h at 25 °C after 1 puncture (mg) | Punctures before loss exceeds 5 mg/h |
|---|---|---|---|---|
| Silicone, 45 Shore A, PTFE-faced | 1.0 mm | 45 | 0.3 | ~30 |
| Silicone, 50 Shore A, PTFE-faced | 1.3 mm | 50 | 0.2 | ~40 |
| Silicone, 55 Shore A, no PTFE face | 1.0 mm | 55 | 0.4 | ~25 |
| Butyl rubber | 1.0 mm | 50 | 1.1 | ~8 |
| Natural rubber | 1.0 mm | 45 | 2.4 | ~3 |
These are representative numbers from my own bench, not a spec sheet, but the ordering is consistent: PTFE-faced silicone re-seals best, butyl is acceptable for single-puncture work, natural rubber is a disaster for multi-puncture sequences. If you are running a 96-well plate with a single needle, the septum on each well sees one puncture and you are fine. If you are running a 12-position autosampler tray that gets re-injected three times, you are at 3 punctures per vial and it still does not matter. The failure mode is not puncture count in most labs. It is time at temperature.
Compression set: the slow failure nobody measures
Compression set is the permanent deformation a septum takes when it has been squeezed for hours. It is measured per ISO 815 (or ASTM D395) by compressing a specimen 25 percent for 22 hours at a set temperature and measuring how much it fails to recover. For a 1.0 mm septum compressed to 0.75 mm, a good silicone recovers to about 0.97 mm. A cheap silicone recovers to 0.90 mm. That 0.07 mm difference is the difference between a seal and a leak.
Why it matters in practice: an autosampler tray that sits at 4 to 8 °C for 12 hours compresses the septum against the cap continuously. When the tray cycles back to room temperature, the septum has taken a set. It no longer pushes back against the cap with the same force. The next run leaks more than the last. This is why the same vial lot fails on the third overnight run and not the first. It is also why I do not trust a septum that has been in a tray for more than 48 hours at temperature, regardless of puncture count.
The practical fix is not exotic: use a septum with a PTFE face on the sample side (the PTFE does not take a set against the sample, and the silicone does the sealing), and do not leave the tray at temperature overnight if you can help it. If you must, use a septum rated for the temperature and check compression set on a sample from each lot. A 25 percent compression set above 20 percent after 22 hours at your tray temperature is a reject.
Measuring loss gravimetrically over a run: the method I use
You cannot fix what you cannot measure, and the industry habit of eyeballing peak area drift is not a measurement. Here is the gravimetric protocol I run when a customer reports sample loss. It takes about 90 minutes and gives you a number you can put in a corrective action report.
- Prepare the load. Fill 12 vials with 1.0 mL of your actual sample matrix (not water; the matrix matters for headspace equilibrium). Cap them with the septum under test, using a calibrated crimper or torque driver.
- Weigh to 0.1 mg. Use a balance with a 0.1 mg readability and a draft shield. Record the tare weight of each vial before filling so you can compute net loss, not gross.
- Run the sequence. Put the vials in the autosampler tray at your normal tray temperature and run your normal method, including the needle punctures. Do not skip the punctures; they are part of the test.
- Re-weigh at intervals. Weigh at 0, 1, 4, 8, and 12 hours. Between weighings, leave the vials in the tray at temperature. Do not cap them again.
- Compute loss rate. Plot net weight loss against time. A sealed vial should lose less than 0.5 mg per hour at 8 °C and less than 1.5 mg per hour at 25 °C for a volatile solvent. If you see 3 to 10 mg per hour, the seal is failing.
- Correlate with peak area. Run the same vials on the instrument and plot peak area against weight loss. If the correlation R² is above 0.95, you have proven the loss is evaporative and not an injection volume problem.
One caution: do not use a COD vial or a wide-mouth vial for this test unless that is what your method uses. The headspace-to-liquid ratio changes the evaporation rate, and a 40 mL COD vial with 10 mL of sample behaves completely differently from a 2 mL autosampler vial. Match the container to the method or the number is meaningless.
Field case 1: the 9 mg drift on a headspace GC sequence
Symptom: A purge-and-trap headspace GC method for volatile organics in groundwater (EPA 8260, run per SW-846) showed internal standard response dropping 15 percent across a 40-vial sequence, with the last vials in the tray failing the 60 percent recovery criterion. The instrument passed calibration at the start of the run.
Measurement: I weighed 10 vials before and after a 12-hour tray hold at 25 °C. Net loss was 4.2 to 6.8 mg per vial, with the highest loss on the vials that had been punctured twice by the headspace needle. I then swapped to a 1.3 mm PTFE-faced silicone septum and repeated. Loss dropped to 0.4 to 0.9 mg per vial, and the internal standard drift fell to 4 percent. The original septa were 1.0 mm silicone with no PTFE face and a Shore A of 40, which is too soft for a 12-hour hold at 25 °C.
Fix: Switched to a 1.3 mm PTFE-faced silicone septum, 50 Shore A, and capped with a calibrated crimper set to 0.9 mm skirt compression. Added a 12-hour tray limit to the SOP. Recovery drift went away.
Field case 2: the screw-thread liner that looked fine
Symptom: A customer running a 2 mL screw-thread vial on a Thermo autosampler (Thermo Fisher chromatography and sample handling) reported 8 to 12 percent peak area loss on the last 20 vials of a 60-vial sequence, with no obvious leak and no septum damage visible under a loupe.
Measurement: Gravimetric test showed 0.2 mg/hour loss on vials capped with a torque driver at 1.5 N·cm and 2.8 mg/hour on vials capped by hand. The hand-capped vials were under-torqued, and the PTFE-faced liner was not compressed against the thread. The seal was made by the cap skirt only, and the liner was floating. Under the autosampler needle’s downward force, the liner lifted slightly and did not re-seat.
Fix: Specified a torque driver at 1.8 N·cm for the screw caps, and rejected any cap that did not show a uniform compression ring on the liner. Loss dropped below 0.3 mg/hour and the drift disappeared. The lesson: on screw-thread vials, torque is a specification, not a preference. Hand-tight is not a number.
The decision checklist: what septum and cap to specify
When a customer asks me what to buy, I do not start with the catalog. I start with four questions and the answers map to a specific part.
| Question | Answer that drives the choice | Specification |
|---|---|---|
| How many punctures per vial? | 1 (single injection) | 1.0 mm PTFE-faced silicone, 45 to 50 Shore A |
| How many punctures per vial? | 2 to 5 (re-injection) | 1.3 mm PTFE-faced silicone, 50 Shore A, 40-puncture rated |
| How long at temperature? | Over 8 hours at 4 to 8 °C | PTFE face mandatory; check compression set per ISO 815 |
| How long at temperature? | Over 8 hours at 25 °C or above | 1.3 mm, 50 Shore A, butyl only if single-puncture and non-critical |
| Cap type | Crimp | Calibrated crimper, 0.8 to 1.2 mm skirt compression, verify monthly |
| Cap type | Screw thread | Torque driver at 1.8 N·cm, verify with a torque tester quarterly |
| Headspace pressure | Positive pressure (purge-and-trap) | PTFE-faced septum, 1.3 mm, crimp only (no screw thread) |
A few other numbers worth keeping on the bench. A standard 11 mm crimp cap needs a crimper setting that produces a skirt diameter of 11.0 to 11.2 mm after crimping; measure with a caliper on 10 caps per lot. A 20 mm headspace crimp cap needs 20.0 to 20.3 mm. A torque of 1.8 N·cm on a screw cap is roughly the point where the liner just starts to compress; below 1.2 N·cm you are not sealing, above 2.5 N·cm you are deforming the cap. These are the numbers I put in a SOP, and they are the numbers I check when a customer calls with a drift complaint.
What I tell procurement when they ask for a cheaper septum
The cheapest septum on a per-unit basis is usually natural rubber or a low-durometer silicone with no PTFE face. It will pass a single-puncture test and fail a 12-hour sequence. The cost of a failed sequence is not the septum; it is the re-run, the out-of-specification investigation, and the analyst time. I have seen a $0.04 per-vial savings turn into a $400 re-run and a 6-hour investigation. That is a 10,000 percent penalty on the savings.
Specify the septum by the four numbers that matter: thickness (1.0 or 1.3 mm), durometer (45 to 50 Shore A), face material (PTFE on the sample side), and compression set (under 20 percent after 22 hours at your tray temperature). Add the cap torque or crimp setting to the SOP. Then verify with the gravimetric test on the first lot and every fifth lot after that. If you need a reference for what a good septum looks like, the major consumables catalogs (Agilent chromatography consumables and columns, Restek technical resources for chromatography) publish the durometer and face material for each part; use those numbers, not the marketing copy.
One more thing: the HPLC filter and the PTFE membrane filter you use upstream of the vial do not cause evaporation loss, but they do determine what is in the vial. If your filtration step leaves particulate that settles on the septum face, the septum can fail to re-seal around the particle. Filter with a 0.45 µm PTFE membrane and inspect the septum face on a sample of vials from each lot. The lab chromatography supply chain has enough variables; do not add a particulate to the seal face.
The decision rule is simple. If a sequence runs longer than 8 hours at temperature, or a vial is punctured more than once, specify a 1.3 mm PTFE-faced silicone septum at 50 Shore A, cap it with a calibrated crimper or a 1.8 N·cm torque driver, and verify the seal gravimetrically on the first lot. If the gravimetric loss exceeds 1.5 mg per hour at 25 °C or 0.5 mg per hour at 8 °C, the seal has failed and the sequence will drift. Measure it, do not assume it.
References & further reading
Related resources from our lab consumables network:
- Lab Chromatography at labchromatography.com
- Hplc Filter at hplcfilters.com
- Ptfe Membrane Filter at ptfemembranefilter.com
- Cod Vial at codvial.com
External references and standards: