
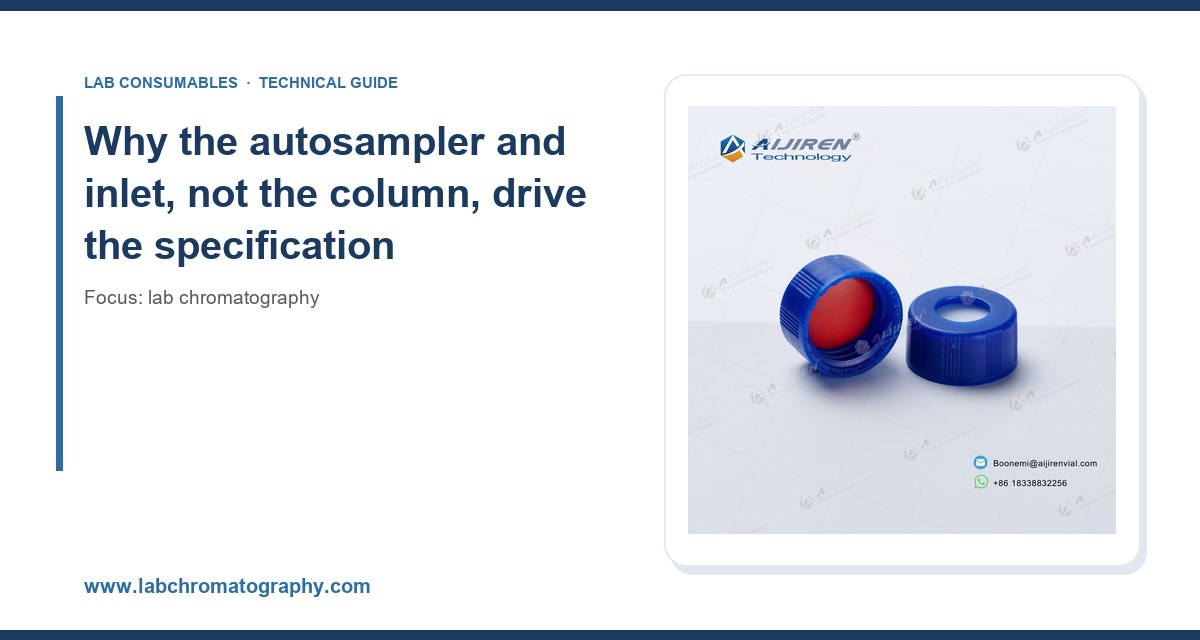
I have watched a perfectly good HPLC method fall apart because the vial was 2 mm too tall for the autosampler gripper, and I have seen a GC inlet liner with the wrong internal diameter turn a clean peak into a shouldered mess. Neither problem had anything to do with the chemistry. Both came down to dimensions: the physical geometry of the vial, cap, septum, needle path, liner, and column end fitting, and whether those dimensions matched the hardware they were bolted into. This guide is about getting those numbers right before you buy.
Most selection guides start with the column. I would argue you should start with the autosampler or the inlet, because that is the piece of metal that physically decides what will fit. A column is forgiving. A gripper is not.
The column is the part everyone talks about, and it is usually the easiest to source. The real constraints live upstream. An autosampler has a fixed needle length, a fixed gripper geometry, a fixed tray height, and a fixed needle-to-septum travel. A GC inlet has a fixed liner bore, a fixed septum nut thread, and a fixed insert depth. Get any of these wrong and the instrument either refuses to run or, worse, runs and gives you data you should not trust.
I think of it as three stacked interfaces:
- Vial-to-gripper: overall height, body diameter, neck finish, and cap height. This is mechanical. The gripper either picks the vial or it does not.
- Needle-to-septum: septum thickness, durometer, and pre-slit or not. This decides how many injections you get before coring, and whether the needle bends.
- Inlet-to-column: liner internal diameter, liner length, column outer diameter, ferrule size, and insert depth. This decides peak shape and whether you get leaks.
Each interface has published dimensions. The mistake is assuming “standard” means the same thing across vendors. It does not.
Vial dimensions: the numbers that actually matter
For a 2 mL autosampler vial, the near-universal reference is the 12 x 32 mm format: 12 mm body diameter, 32 mm overall height including the crimp or screw cap. That 32 mm figure is the one to protect. I have measured vials from discount suppliers at 32.6 mm and watched them jam a tray mid-sequence. Half a millimeter is enough.
The neck finish is the other trap. The two screw-thread standards you will meet are the 8-425 (8 mm thread, 425 pitch) used on many small-volume and older autosamplers, and the 9 mm short-thread wide-mouth format that dominates modern Agilent and similar trays. They are not interchangeable. A 9 mm cap will not seal an 8-425 neck, and forcing it produces a leak you will only notice when the injection volume is short.
Working dimensions I check on every vial purchase
- Overall height: 32.0 mm nominal, tolerance typically ±0.3 mm. Reject anything outside ±0.5 mm.
- Body diameter: 12.0 mm, tolerance ±0.2 mm. Wider bodies bind in 12-position trays.
- Neck inner diameter: 6.0 mm for 8-425, roughly 6.0 mm for 9 mm wide-mouth. This sets the maximum needle gauge and how much you can draw without touching the shoulder.
- Residual volume at 100 µL draw: a conical insert bottom should let you recover down to about 5 to 10 µL. Flat-bottom vials leave 50 µL or more.
- Glass class: Type I borosilicate for anything going near a pH above 8 or below 4. Type III soda-lime will leach sodium and silicate into your blank.
If you are running COD or total organic carbon alongside your chromatography, the vial geometry changes again, and you should not assume a chromatography vial doubles as a digestion vial. The COD vial format is built around a fixed reagent volume and a screw cap rated for the digestion block temperature, usually 150 °C for 2 hours under the standard dichromate method. That is a different thermal and pressure envelope from a septum-sealed autosampler vial, which is why I keep the two lines separate on the shelf.
Septum selection: puncture count, durometer, and the coring problem
The septum is the cheapest component and the most common source of silent failure. Two things kill it: coring (the needle punches a plug of silicone into the vial) and creep (the septum deforms under the cap and stops sealing).
Here are the working numbers I use:
- Silicone/PTFE sandwich septum: the PTFE faces the sample, the silicone provides reseal. Good for most reversed-phase work. Typical puncture count before coring rises: 3 to 5 injections at the same needle position on a 1 mm-thick septum.
- Pre-slit septum: a molded slit lets the needle pass without punching. Puncture counts improve to 10 to 20, but you pay for it with higher evaporation loss on long sequences. Not for volatile analytes.
- Durometer: silicone septa run around 45 to 55 Shore A. Softer seals better but cores faster. Harder resists coring but needs more cap torque to seal.
- Thickness: 1.0 mm is standard for 9 mm caps. Thicker septa (1.3 mm) seal better on high-pressure or heated trays but reduce the usable needle travel.
My rule: if a sequence runs more than about 50 injections from the same vial, use pre-slit and accept the evaporation trade-off, or split the sample across two vials. If the sample is volatile, use a solid septum and change vials. There is no septum that does both well.
Cap torque and why hand-tight is not a specification
For screw caps, “hand-tight” is meaningless across a lab of ten people. I specify a torque. For 9 mm screw caps on a 1 mm septum, 0.6 to 0.9 N·m is the working range. Below 0.5 N·m you get leaks on the injection port; above 1.2 N·m you deform the septum and it creeps. A $30 torque screwdriver pays for itself the first time you avoid a re-run of a 96-well sequence.
Crimp caps are a different animal. The crimper setting matters more than torque, and a badly set crimper either leaves the cap loose (evaporation) or crushes the neck (cracks). Check crimp height against the 32 mm overall with a caliper on the first ten vials of every new box.
Matching the needle and syringe to the vial and the loop
The autosampler needle has a fixed length, typically 51 mm for a standard 12 x 32 mm vial, and a fixed gauge, commonly 22s or 23 gauge for analytical work. The “s” designation (22s) means a heavier wall for the same outer diameter, which resists bending when it hits a septum or a vial bottom.
Two mismatches to watch:
- Needle too long for the vial: the tip bottoms out and bends, or it draws from the conical insert’s tip where the last few microliters are unreliable. Set the needle depth so the tip sits 1 to 2 mm above the bottom.
- Needle too short for the insert: you draw from the headspace above a conical insert and get a short injection. Check by weighing a water draw: 100 µL of water should be 99.8 mg at 20 °C. If you are consistently low, the depth is wrong.
The loop or syringe volume sets the injection range. A 100 µL syringe with a 10 µL loop gives you full-loop injections from 1 to 10 µL reliably; below 1 µL you are into partial-loop territory and the RSD climbs above 2%. If your method needs 0.5 µL injections, buy a smaller loop rather than trusting the syringe.
GC inlet geometry: liner ID, length, and the insert depth
The GC inlet is where dimensions do the most damage. The liner is a glass tube with a defined internal diameter, length, and often a glass wool plug or a cup. The column enters the liner from below, and the distance the column protrudes into the liner (the insert depth) determines whether you get a clean vaporization or a cold spot.
Working specs I hold to:
- Liner internal diameter: 4 mm for splitless injections with a 0.25 mm column and a 1 to 2 µL injection. A 2 mm liner on the same injection gives a higher linear velocity and better peak shape for narrow-bore columns, but it is less forgiving of dirty samples. A 4 mm liner with glass wool is the default for dirty matrices.
- Liner length: typically 78.5 mm for a standard split/splitless inlet. It is not universal; check the inlet body.
- Column protrusion into the liner: 10 to 15 mm below the top of the liner for splitless. Too shallow and the sample hits the column directly; too deep and you get a cold spot at the inlet.
- Septum nut torque: 0.4 to 0.6 N·m. Over-tightening crushes the septum and causes the classic “ghost peak” from silicone bleed.
The column ferrule is the other half of this interface. For a 0.25 mm ID column, use a 0.4 mm graphite or Vespel/graphite ferrule. A 0.5 mm ferrule on a 0.25 mm column will not seal without over-torquing, and over-torquing cracks the nut. For 0.32 mm columns, a 0.5 mm ferrule is correct. This is a two-number decision and I get it wrong less often than most people because I keep a ferrule gauge on the bench.
Liner and column cross-reference
If you are running EPA methods under SW-846, the method text often specifies the liner and column dimensions. Do not treat those as suggestions. Method 8270, for example, is written around a specific column film thickness and a deactivated liner, and swapping to a different liner ID is a method deviation you have to document. The Restek technical resources are a good cross-check for liner and column pairings when the method is ambiguous.
Column end fittings, ferrules, and the connection to the detector
For HPLC, the column end fitting is a 1/16 inch standard, and the ferrule is either a two-piece stainless or a one-piece PEEK. The decision is pressure and chemistry:
- Stainless two-piece ferrules: rated to 400 bar and beyond, reusable a few times, but they cold-flow and eventually leak. Torque to 0.8 to 1.0 N·m on a 1/16 inch fitting.
- PEEK one-piece ferrules: finger-tight plus a quarter turn, good to about 200 bar, and they do not cold-flow the same way. But PEEK swells in some solvents (DMSO, THF) and will not reseal after removal.
The column outer diameter matters for the holder and the fitting depth. A 4.6 mm analytical column uses a standard 1/16 inch fitting; a 2.1 mm microbore column uses the same fitting but a shorter ferrule seat, and using the wrong ferrule on a 2.1 mm column is a common cause of peak broadening from an extra dead volume at the inlet.
Between the pump and the column, the filter is the part that quietly sets your backpressure and your column life. A HPLC filter with a 0.2 µm pore and a 4 mm or 13 mm diameter is the usual choice; the 13 mm in-line version adds a little dead volume but catches particulates before they reach the frit. I change the in-line filter every 500 injections or whenever the pressure rises more than 10 bar above baseline, whichever comes first.
For sample preparation upstream of the column, a PTFE membrane filter is the right choice for organic solvents and aggressive matrices, rated to 0.2 µm and compatible with everything from acetonitrile to dichloromethane. Do not use a cellulose acetate filter on a DMSO sample; it will dissolve and you will see it as a ghost peak.
A decision checklist with real numbers
This is the checklist I hand to a new analyst before they place a consumables order. Every line has a number because “compatible” is not a specification.
- Vial height: 32.0 mm ±0.3 mm. Measure ten from the first box with a caliper.
- Vial diameter: 12.0 mm ±0.2 mm.
- Neck finish: 8-425 or 9 mm short-thread, matched to the tray, not to the cap you have in stock.
- Septum: 1.0 mm silicone/PTFE, 45 to 55 Shore A, pre-slit only if the sequence exceeds 50 injections per vial.
- Cap torque: 0.6 to 0.9 N·m for 9 mm screw caps; crimp height checked against 32 mm total.
- Needle: 22s or 23 gauge, 51 mm length, depth set 1 to 2 mm above vial bottom.
- Injection volume: 1 to 10 µL on a 10 µL loop; below 1 µL use a smaller loop, not a bigger syringe.
- GC liner: 4 mm ID, 78.5 mm length for standard split/splitless; 2 mm ID only for narrow-bore columns and clean matrices.
- Column protrusion: 10 to 15 mm into the liner for splitless.
- Ferrule: 0.4 mm for 0.25 mm ID column, 0.5 mm for 0.32 mm; torque 0.4 to 0.6 N·m on the septum nut.
- HPLC fitting: 1/16 inch, stainless two-piece for >200 bar, PEEK one-piece below; torque 0.8 to 1.0 N·m.
- In-line filter: 0.2 µm, changed at 500 injections or +10 bar.
If you want a single source to cross-check the hardware side, the Agilent chromatography consumables and columns catalog and the Thermo Fisher chromatography and sample handling pages both publish the dimensional drawings. Use them. Do not rely on a supplier’s “fits most autosamplers” claim.
Operational precautions that save sequences
Dimensions get you a compatible system. Habits keep it running.
- Condition new liners. A fresh liner has residual manufacturing volatiles. Run a blank injection after installation and look for siloxane peaks at m/z 73, 147, 207. If they are there, the liner needs a bake-out at 300 °C for 30 minutes.
- Do not mix ferrule types on one column. A stainless ferrule on one end and a PEEK ferrule on the other is a leak waiting to happen at the PEEK end under pressure cycling.
- Check septum seating after every cap change. A septum that is not fully seated sits 0.2 to 0.3 mm high and changes the needle penetration depth.
- Keep a torque wrench at the instrument. If the wrench is in a drawer across the lab, nobody uses it.
- Log puncture counts. A simple tally on the tray label tells you when to change the septum before it cores, not after.
Troubleshooting checklist: symptoms and the dimensional cause
When a method misbehaves, work through this list before you touch the column. In my experience, more than half of “column problems” are upstream dimensional mismatches.
- Shouldered or split peaks on early eluters: injection volume too large for the liner ID, or column protruding too far into the liner. Check the 4 mm liner and the 10 to 15 mm protrusion.
- Ghost peaks at m/z 73/147/207: septum bleed from over-torqued septum nut, or a liner that was not conditioned. Torque to 0.4 to 0.6 N·m and bake the liner.
- Short injections and high RSD: needle depth wrong, or a leaking cap. Weigh a 100 µL water draw; if it is below 99 mg, check the cap torque and septum seating.
- Rising backpressure: in-line filter loaded, or a partially cored septum plugging the frit. Change the 0.2 µm filter first.
- Peak broadening on a 2.1 mm column: wrong ferrule seat creating dead volume at the inlet. Swap to the short-seat ferrule.
- Vials not picked up: overall height outside 32.0 ±0.3 mm, or body diameter over 12.2 mm. Measure the box.
- Evaporation loss on long sequences: pre-slit septum on a volatile sample, or a loose crimp. Switch to solid septum and re-crimp.
- Carryover between injections: needle wash volume too low for the vial’s residual volume, or a flat-bottom vial leaving sample in the shoulder. Use a conical insert.
If you are sourcing across a mixed fleet, the Lab Chromatography catalog is a reasonable starting point for cross-referencing part numbers, but verify every dimension against the instrument manual before you commit to a case quantity.
Recommendation: what to standardize and what to keep flexible
Standardize the interfaces that touch metal, and keep flexibility where the chemistry varies.
On the autosampler side, I would standardize on 12 x 32 mm, 9 mm short-thread vials with 1.0 mm silicone/PTFE septa, a 0.6 to 0.9 N·m cap torque, and a 22s needle at 51 mm set 1 to 2 mm above the bottom. Buy one torque wrench per instrument and one caliper per lab. That combination covers the large majority of modern autosamplers and eliminates the two failure modes I see most: jams and short injections.
On the GC side, standardize on a 4 mm ID, 78.5 mm liner with glass wool for dirty matrices and keep a small stock of 2 mm ID liners for clean, narrow-bore work. Use 0.4 mm ferrules for 0.25 mm columns and 0.5 mm for 0.32 mm, and torque the septum nut to 0.4 to 0.6 N·m. Condition every new liner before it goes in.
On the HPLC side, standardize on 1/16 inch stainless two-piece ferrules at 0.8 to 1.0 N·m for anything above 200 bar, and keep PEEK one-piece ferrules for the low-pressure, solvent-sensitive methods. Use a 0.2 µm in-line filter changed at 500 injections, and a 0.2 µm PTFE membrane for sample prep on organic matrices.
The one thing I would not standardize is the septum. Match it to the sample: solid for volatiles, pre-slit for long sequences, and accept that you will stock two types. The cost of a second part number is trivial next to the cost of a re-run.
Dimensions are boring until they are wrong. Then they are the only thing that matters. Measure the vial, torque the cap, check the ferrule, and set the needle depth before you trust the method. The chemistry will do what the chemistry does; the hardware either lets it or it does not.
References & further reading
Related resources from our lab consumables network:
- Lab Chromatography at labchromatography.com
- Hplc Filter at hplcfilters.com
- Ptfe Membrane Filter at ptfemembranefilter.com
- Cod Vial at codvial.com
External references and standards: